1

Introduction

Name badges at your conference or event do so much more than help attendees identify each other. When done properly, they do everything from improving networking opportunities to supporting your branding efforts. And, as one of the first things that attendees see, they also give that ever-important first impression of your event.

Keeping this in mind as you plan your conference can help you decide what kind of badge you’d like to have. Put as much thought into your badge as you do your signage, brochures and other conference collateral, because they truly do carry just as much weight as those other assets. From choosing the type of badge you want to use, to designing it to determining how badges will be displayed, this guide will help you understand what your badge can do and how to best maximize the opportunities presented by your conference or event badge.

2

Understanding the Importance of Event Badges

Gone are the days when it was sufficient for attendees to write their name on a sticker that said, “Hello, My Name Is …” Badges have become sophisticated and resourceful, and if you don’t believe that, look at these six ways ID badges enhance your event.

IDS-PillarPage-c2-1

1. Start conversations. Often, people attending a conference don’t know most (or any) of the other attendees, and that can make for some awkward silences. Well-designed name badges can change that; they can help people remember the name of someone they talked to the day before, or maybe there’s information on the badge — such as where they’re from or who they work for — that provides the necessary ice-breaker. (You can even help the process along a bit by including a “fun fact” about each person on their badge, such as an unusual interest or hobby that could spark conversation.)

IDS-PillarPage-c2-2

2. Boost networking. Networking opportunities are one of the main reasons people attend conferences, and badges can make that easier for them. When badges are color-coded to identify the individual roles of the attendees (speaker, exhibitor, sponsor, etc.), it becomes easier for attendees to locate, at a glance, the people they want to talk to.

IDS-PillarPage-c2-3

3. Support branding initiatives. Name badges should be just as much a part of your branding and marketing efforts as your signage, brochures and T-shirts. Integrate elements like your logo, slogan and colors to create consistent messaging, and remember that many attendees will hold on to badges as keepsakes. A creative, well-designed badge displayed in an attendee’s office can serve as advertising for your brand long after the event is over.

IDS-PillarPage-c2-4

4. Increase visibility on social media. Include your social media handles and hashtags on the badge and encourage attendees to include those hashtags when posting photos from the event. It’s free advertising for your conference, and you’re bound to get some fun, shareable posts as a result.

IDS-PillarPage-c2-5

5. Promote your sponsors. Give your event sponsors a little extra mileage by including their logos across the bottom or on the back of your badge; this is something that can be offered to sponsors of a certain level, so you can also use it as an incentive for them to upgrade their participation.

IDS-PillarPage-c2-6

6. Improve security. Requiring every attendee to wear a name badge ensures that the only people there are registered and are supposed to be there. If you’d like to add and improve ID badge security to your conference or event badge, include a barcode or other security measures that require scanning before attendees can enter.

IDS-PillarPage-c3

Designing Your Badge

You have many options when it comes to designing your badge, and chances are you have a lot of information that you want to include. This is where working with your in-house designer or outsourcing the production work to a badge company can be useful; they’ll have a good idea of what needs to be included and how it should best be arranged.

Working with a graphic designer can also ensure that the fonts, colors and artwork placement all follow good design rules. And, when it comes to conference or event badges, here are a few tried and true rules to follow:

IDS-PillarPage-c3-1

1. Prioritize your information. What needs to be included on the badge, and what would just be nice to include? Make a list of all these things, and know which ones you’re willing to give up when space gets tight. Vital info includes name, name of company and/or title, your branding and, if promised, sponsor logos.

IDS-PillarPage-c3-2

2. Make first names readable from a distance. One rule of thumb says that the first name of the wearer should be legible from 15 feet away, which means the font should be about 72 point. Don’t worry about making the last name quite as big; the idea here is for the first name to stand out.

IDS-PillarPage-c3-3

3. Don’t make design elements compete with one another. Your logo shouldn’t compete with the name of the person wearing the badge, nor should anything else. While it’s common for events to make their logo the dominant focal point of the badge, that doesn’t do attendees much good; they’ll benefit more from being able to read the names of others. So, by all means, include the logo from your conference, but keep in mind what’s most important to the people wearing and using the badge.

IDS-PillarPage-c3-4

4. Use both sides. Many people don’t use the back of a conference or event badge, which means they’re wasting half of their real estate. Consider including a schedule of events on the back; it’s also a great place for those QR codes that link to a conference brochure with a more complete schedule or to a sponsor’s website.

IDS-PillarPage-c3-5

5. Keep it colorful. Nobody wants a bland, boring badge. While you don’t want to blind attendees with color, you do want your badges to be lively and eye-catching. Use the same designs and colors found on your event brochures for branding consistency. Certain color combinations work better than others, so work with your designer to make sure that you’re getting the maximum amount of “pop” to your design.

IDS-PillarPage-c3-6

6. Work with your theme. Sometimes, the theme of your event can help the design fall into place. Doing an event with a rock ‘n’ roll theme? Make your event badge look like a backstage pass. Does your conference use a travel theme? Design it to look like a boarding pass and print the “Itinerary” on the back. You can add to the novelty and overall appeal of the badge by implementing creative and unexpected approaches to your badges.

Your design should complement the rest of your branded conference materials and should be durable, easy to read and interesting to look at. Aim to create something memorable that fits the overall tone of the event; brainstorm a few ideas with your event team to come up with something truly innovative instead of creating “just another badge.”

IDS-PillarPage-c4

Choosing the Right Type of Badge

IDS-PillarPage-c4-1
IDS-PillarPage-c4-2

The type of badge you choose for your conference or event is going to say a lot about the quality of your event. If you opt for a paper insert that’s printed on-site and placed into a vinyl or plastic ID holder, it won’t have the same impact as a full-color laminated badge. Quality badges aren’t cheap, but they are an investment that’s worth making.

Even if you’re on a budget, you want to make sure your badge is consistent with the quality and branding of the other assets, so take that into consideration as you choose what type of badges you’ll use. High-quality laminated badges that are professionally designed will immediately elevate the perception of your event. Meanwhile, paper badges can tear easily, and if they get wet, the ink can run or the badge can disintegrate completely.

In addition to selecting the right materials for your badges, it’s also important to consider the size of the badge you need. A credit card-size badge isn’t going to have the same kind of impact (or allow for the amount of information) that a 4-by-6-inch badge allows. A larger badge allows greater visibility, which also means more impact, so don’t skimp on size in hopes of saving a few dollars.

IDS-PillarPage-c5

When (and Where) to Print Your Badge

Once you know what kind of badge you want and what you want it to look like, you also have to determine whether you’re going to have badges printed beforehand or print them on-site at your event. If you want to do it on-site, you have the advantage of being able to take each attendee’s photo and add it to the front of the badge. (However, be aware that this will slow down the line for picking up badges.)

If you outsource the job to a professional badge printing company, you’ll have all of the badges available in advance, while if you print on-site, you have the flexibility to print badges for last-minute registrants. You’ll want to make sure you invest in a quality badge printer that can provide all of the features you want, such as multiple colors, two-sided printing, etc.

IDS-PillarPage-c5-1
IDS-PillarPage-c5-2
IDS-PillarPage-c5-3

If you’re trying to choose between the two, here are some questions to consider:

  • Do you have enough staff to handle the on-site printing? Badge printing isn’t a complex process, but it does require a certain skill level. Do you have enough personnel to manage all aspects of the badge printing on-site and keep the line moving? You can save money when compared with outsourcing all of the work to a printer, but keep in mind that means you’ll need to do all the design work yourself and pay for the time of the people who are operating the printer and keeping the line moving.
  • Do you have tech support? You never want to think that you’re going to have a printing glitch in the middle of registration when there’s a long line of people waiting to get their badges printed. But it happens. You’ll need to make sure you have an IT professional or, at the very least, a tech-savvy worker who can jump in and solve problems as they arise. The last thing you want is to have a printer issue even before the event begins and not be able to provide attendees with their badges.
  • Do you need other types of materials printed for your event? Are you planning any other printed items, like wristbands, or different types of badges? Make a list of everything required for your event before you decide to buy, since you don’t want to spend the money on a badge printer only to find out you still need to outsource additional work to a badge printing company. It makes more sense to have it all handled by one source.
  • Will you use the badge printer again? Do you have an ongoing need to make badges or IDs? If so, a badge printer can be a great investment. But if you won’t use it regularly, buying all the supplies needed and then maintaining and/or storing the equipment could be more expensive than contracting out the work.
Regardless of which option you choose, you will want to create a system for easy distribution on-site to make that process smooth and seamless.
IDS-PillarPage-c6

Distributing Your Badges

Getting the right badges into the hands of the right attendee in a timely fashion isn’t rocket science, but there definitely is a science to it. Organization is key, and it’s something to figure out early in the process. How well (or not) the registration process goes for attendees can set the tone for the days that follow, so do what you can to keep things running as quickly and hassle-free as possible. Here are some tips for streamlining the process: 

  • Wait to distribute name badges until attendees arrive at the event. While it can save time on the day of registration to mail things like badges and conference materials in advance, there’s a huge downside to that — beyond the cost of mailing those items. What happens when (not if) someone forgets their materials, including their name badge? Or the luggage carrying all of those items is lost? You’d need a backup plan to provide a substitute badge. By waiting until the event, you’re assured that all of the materials will be at the conference when they’re needed.

IDS-PillarPage-6-1

  • Organize badges alphabetically. Sometimes, event planners try to organize name badges by company or by the room a guest is staying in. Cut to the chase by organizing badges alphabetically, and it will go faster.
  • Don’t put all the badges in the same location. When all the attendees have to go to the same place to pick up their badges, you’re in danger of ending up with a line longer than the one at the DMV on the last day of the month. Group badges alphabetically and designate different areas for attendees to pick them up. You could have group A-G at one station, H-M at another, etc.
  • Let guests do it themselves. Placing badges on tables or on bulletin boards (again, grouped alphabetically) is another way to cut down the amount of time your staff spends searching for name badges.
IDS-PillarPage-c7

Displaying Your Event Badges

All right, now you know what your badges will look like, when and where they’re going to be printed and how they’re going to be distributed. That should be just about it, right? Almost.

You still want to decide how attendees will display their badge. Are you going to provide a clip that attaches the badge to a lapel? Or do you want to go with a retractable reel? What is the best option for your particular conference? 

IDS-PillarPage-6-1

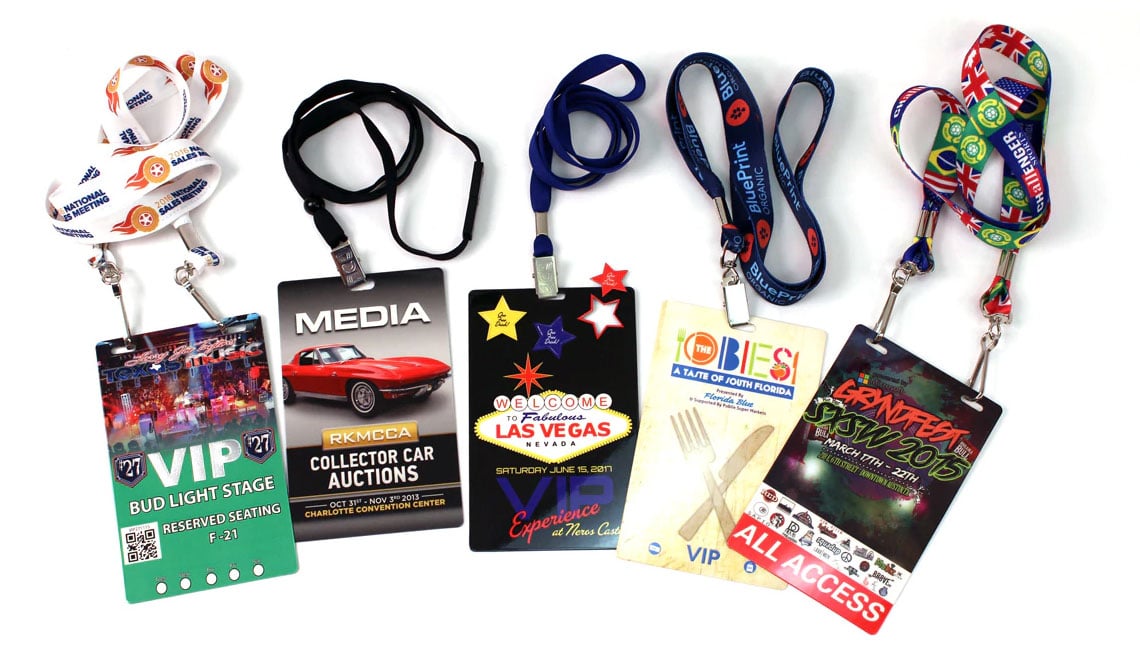
Lanyards provide one of the best and most popular options around; you can opt for a basic black lanyard, or go with lower-cost assorted colors. However, it’s worth considering using your lanyards as another opportunity to sell a sponsorship.

Since every attendee will be wearing a lanyard, it becomes a pretty valuable piece of real estate for sponsors. Let sponsors include their logo and company colors on a custom lanyard, and even include their web address on them. It’s a great way for them to get maximum exposure while at the same time presenting a money-making opportunity for you.

IDS-PillarPage-c8

3 More Tips for Your Conference or Event Badge

IDS-PillarPage-c8-1

Let it double as a discount/reward card. Partner with businesses (coffee shops, restaurants, etc.) near the conference who are willing to offer a discount on goods or services when attendees show their conference badge.

IDS-PillarPage-c8-2-1

Give personalization options. Set up a table to let attendees decorate their badges after registration. A table filled with ribbons, stickers, beads and other craft items near the registration table will encourage attendees to have a little fun right off the bat — and it’s also a chance for them to meet new people before the conference even begins.

IDS-PillarPage-c8-3-1

Get high-tech. Embed a QR code on the back of the badge that will unlock a special video with a welcome message or other exclusive video.

IDS-PillarPage-c9-1-2

Make the Most of Your Conference Badge

Putting extra time and thought into your conference or event badge can make it memorable and useful to attendees. With so many different options available, make it your mission to create a badge that attendees will be talking about long after the event is over.

Call idshop Today